Hoya are funny plants. Some cost $95 for a single, sad stem and others you can get full baskets for $20. Because of this, Hoya are the perfect sharing plants. Usually regardless of variety and price point, Hoya grow quickly. And, for me, they hold the record for most successful propagated plant. How fun.
My Hoya collection has gotten vast over the last year because they are 1. pet safe and because they’re 2. easy to propagate. This constant propagating made me realize that 1. I have not done a Hoya propagation post and 2. there’s a need for one. Ok, I lied, I kind of have, but this post has more.
Hoyas are easy to propagate, sure, but they aren’t the most obvious to propagate. Hoya are missing those distinct pimples/nodes like Monstera and easy-to-see air roots like Pothos. There’s a bit of know-how needed before you snip Hoya. Plus no one wants to mis-cut one their $90 Hoya mathilde because that would be the worst.
I routinely chop my Hoyas in summer/fall, but not in winter, more on that later, so I always have random Hoya segments and dismembered pieces in water. Oh god, that sounds terrible. You know I don’t mean it in a weird way. Let’s just dive in.
Why You Should Propagate Hoya
Like any other houseplant, propagating and routine snipping promotes shapely and voluptuous growth. You know, the kind that makes you say “oh la la” in a terrible French accent. You can take a spindly plant, chop off the top and soon you’ll be graced by a fuller plant who is happier and living her best life.
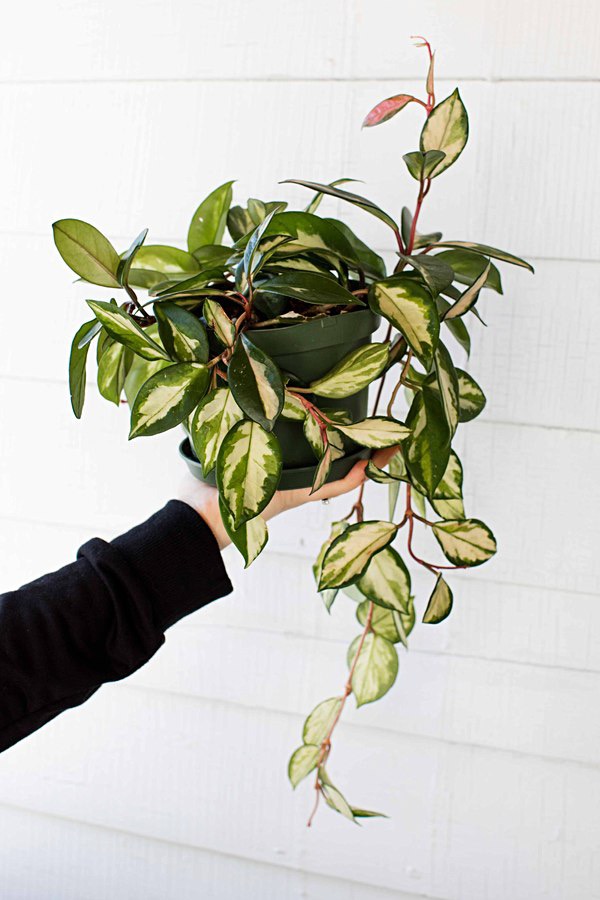
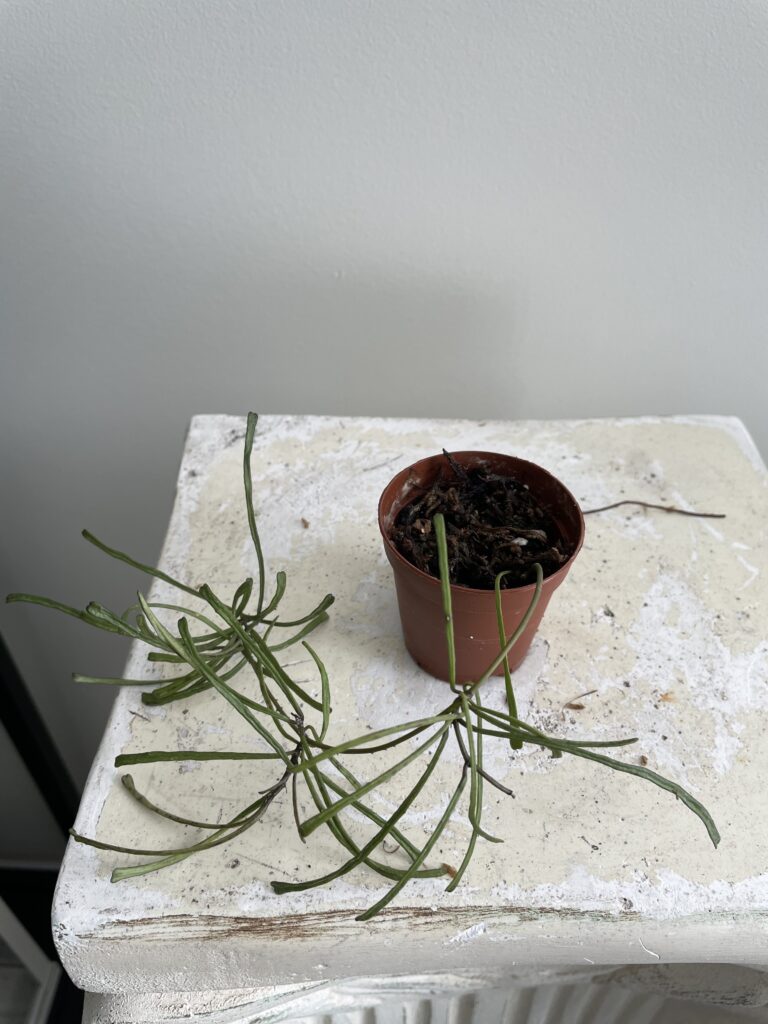
This Hoya carnosa “krimson princess” has seen multiple pruning sessions, a mealybug infestation, and a total cold shock when I moved and the movers left my plant box outside for hours. Yes, I’m still salty about that. She has always bounced back best from pruning and I always propagate salvageable pieces into new, happier plants.
Also if you’ve come this far and don’t know what kind of Hoya are out there, read this post. I’ll be talking about a select few of these that are common to find in garden centers. You’ll get the general propagation gist just by those examples, I promise.
My Favorite Ways to Propagate Hoya
Yes, there are multiple ways to propagate Hoya. I have propagated in three types of mediums and have the best success with water and sphagnum moss. Some people just stick a cutting in soil or perlite but I never have consistent luck with either of those. I really like a method that gives me consistent success because I care about my plants and don’t want the babies to wither.
If you’ve been a visitor on here, you know my love for water propagation, which I use for most Hoya. For my more expensive Hoya, I really like moss. It depends based on the variety, but you can definitely do one or the other for any Hoya. The trick is to know how to keep them happy while they grow their little plant legs. And by plant legs I mean roots, but the image of plant legs is kinda cute.
How to Propagate Hoya + Where to Cut
Before we get all ready to chop up some Hoya, let’s be sure we know where we’re going to cut. This may be a bit redundant if you’ve followed my propagation posts before, but you’re here now and refreshers are always good.
Let’s use a good close-up of my Hoya australis with fun lines:
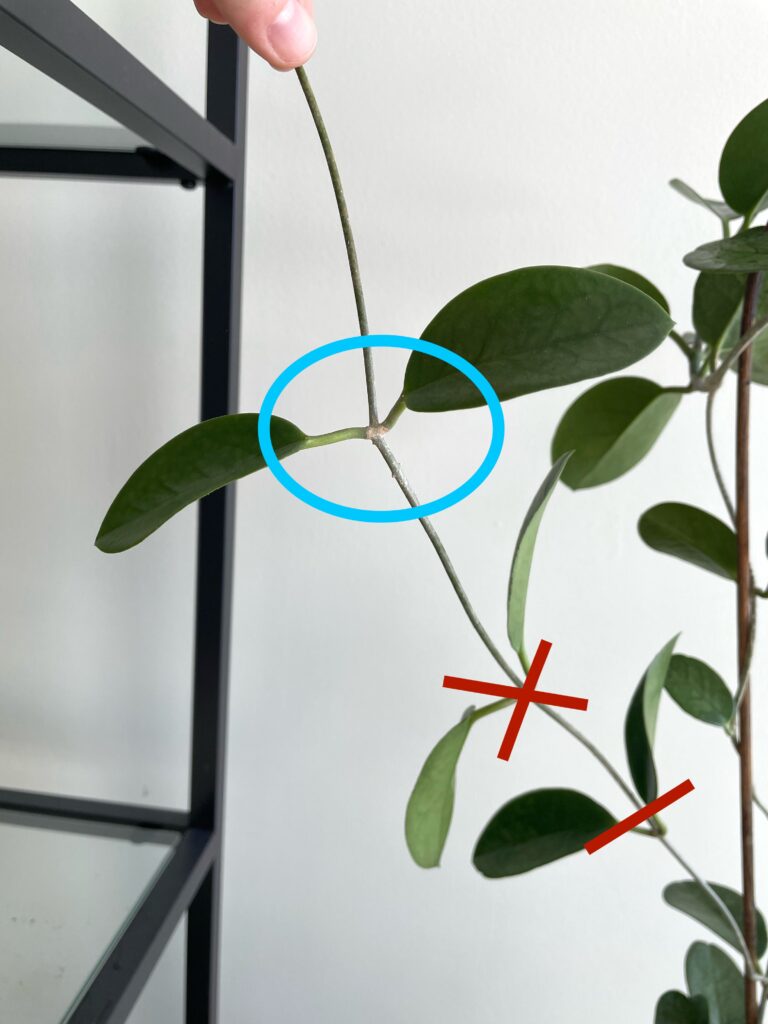
If I were to cut this, I would want to:
- Cut where the red line is, at the base of this stem.
- Remove the two leaves that are marked with an “x”. You will be removing these once you cut it off the plant. Once you do, you’ll see a couple little nodes and that’s where the new roots will come out. We’re also removing these leaves so it can push out said roots and not spend energy on keeping these leaves alive.
- These topmost leaf/leaves in the blue oval stay on the plant. New growth will continue to grow from there. This is called a top cut.
- I highly recommend cutting a top cut, which is the top most growth on a plant. I show this Hoya because you can, theoretically get multiple cuts from a plant, too, if you take from the middle of a stem.
Time to Propagate Hoya
Let’s do this! Don’t be scared it’s totally fine and fun. Everything is fine. We’re all fine.
Propagating Hoya in Water
Let’s try this in action. Revisiting my plant propagation post covers most of this but I’m going to recap because I’m awesome. Here are the tools you’ll need:
- A sterilized knife, fancy scissors or snippy scissors (I’m using the fancy scissors in this post)
- The plant you are about to chop up
- A clean workspace free of cats, papers, or the expensive MacBook you’re reading this on
- A glass jar or vessel for said plant cutting
- Clean filtered water
Once you’ve assembled your propagation team of tools, you can make your cut and place in water. See the following.
First, make the initial cut:
- Just like in my diagram above, make a top cut so you have a set of nodes to go in water and a couple of leaves remaining on the cutting.

- Here’s the cutting! Now it’s time to snip off those middle leaves.
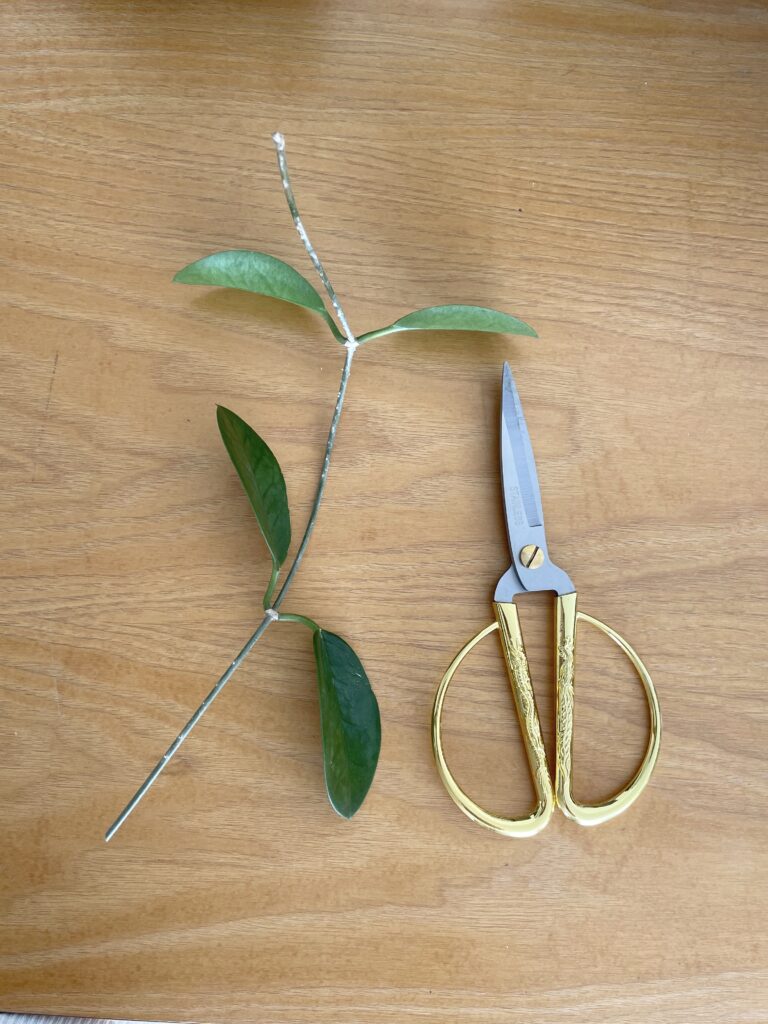
- Snip the leaves as close to the stem as possible so the cutting looks like this:

- Then place the cutting in a small jar or vessel with water. Make sure you are immersing that lowest node (where you took the leaves off) in water. Place in a sunny warm location (not a cold windowsill). You should see roots start to develop in a few weeks!
A few tips:
-I stress a sunny warm window because new roots may not develop or may develop super slow if in a cold/drafty location. Keep these babies bright and happy.
-As mentioned above, I tend to not propagate in winter. Hoya don’t’ necessarily become dormant in winter, but they do grow slower. To give them a better chance of pushing out new growth, I just prefer to perform propagation surgeries in warm months.
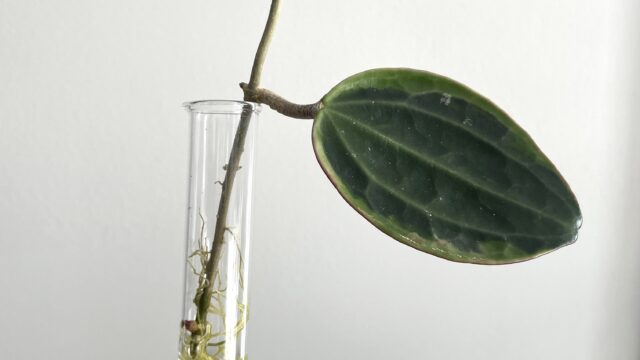
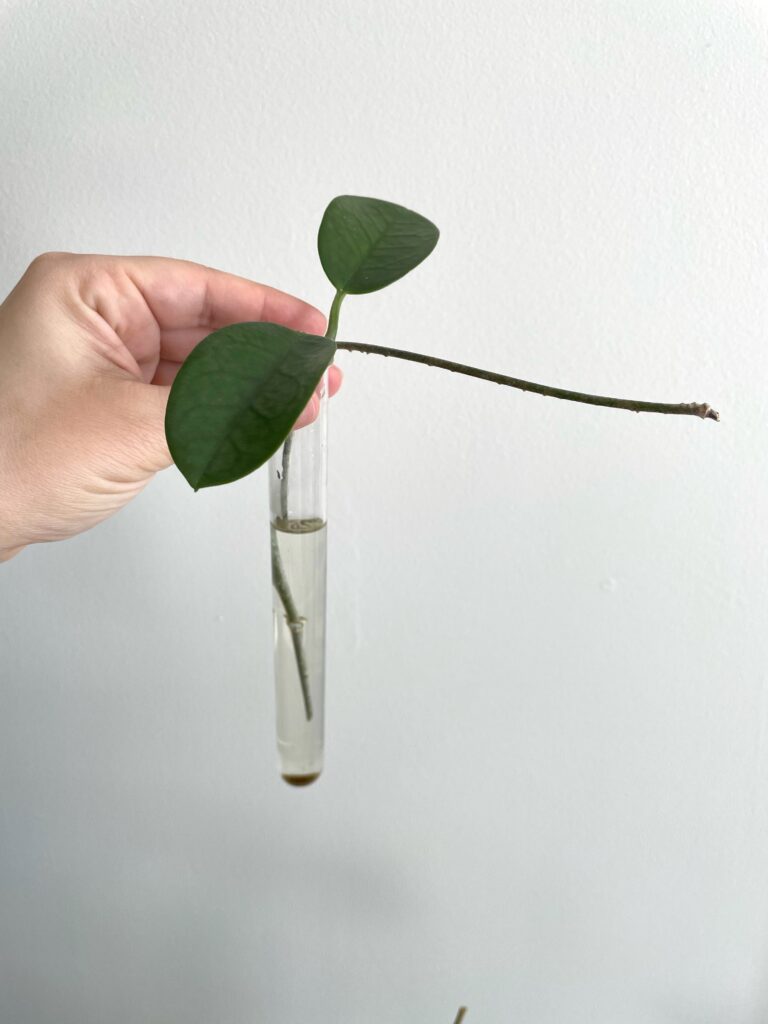
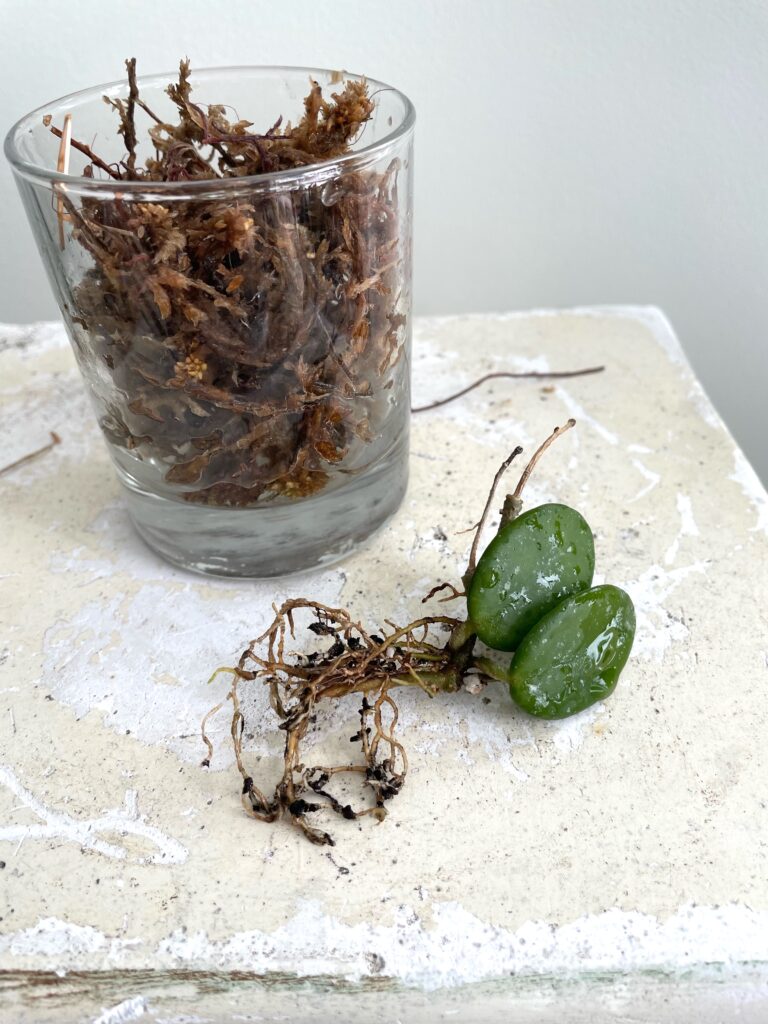
-Make sure you are immersing that lowest node (where you took the leaves off) in water. Here is a piece of Hoya macrophylla that was cut and all lower lower leaves removed. This has been growing new leaves and roots for the last three months in plain ol’ water.
Propagating Hoya in Moss
Now onto the (less conventional) sphagnum moss.

Sphagnum moss is very dry out of the bag and very messy. When handling it, know that it is prickly and stemmy and it’s annoying to touch.
Also, you’ll also want to hydrate it. When you’re ready to begin, you’ll want all the above tools plus a jar of water to soak the moss in. I put about 1/2 cup of moss in 1/2 cup of water and let it soak for 20 minutes.
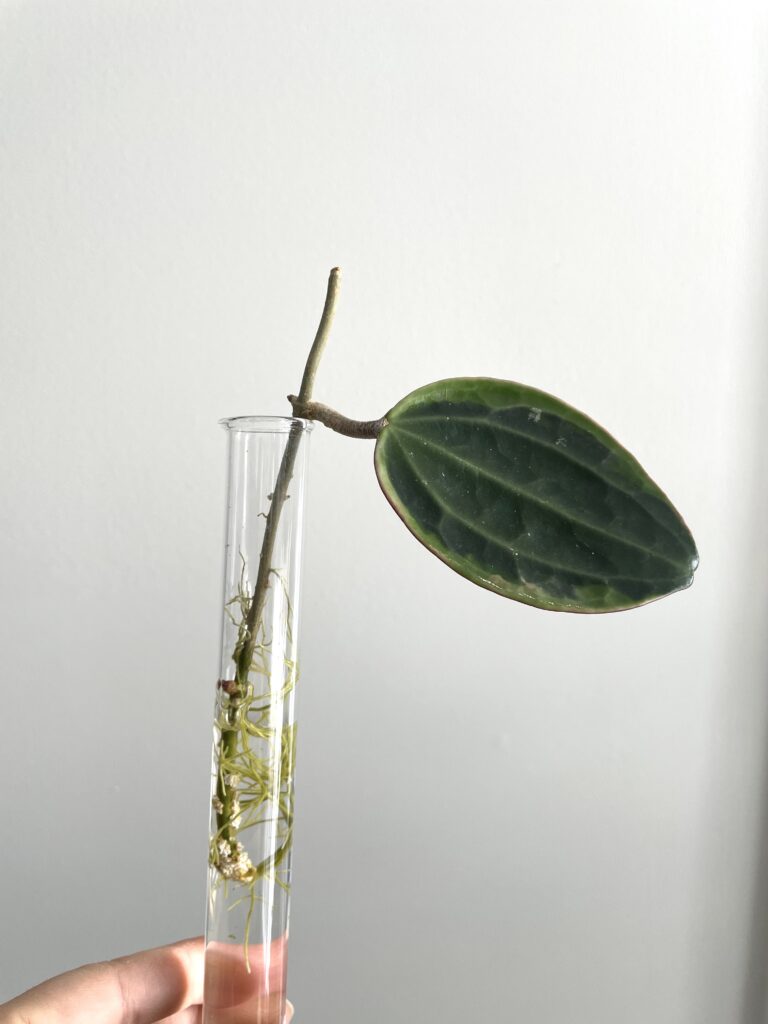
This is my second Hoya retusa cutting. The first time (2019) I stuck it in water on a windowsill in March and it just melted/died/vanished. I got another cutting recently and, in my second attempt, was a little more careful and wanted to see if moss presented a better result. This cutting was shipped in the mail, so it was already stressed and I wasn’t super optimistic. HOWEVER, I poured love into this baby and wrapped the node area in the wet moss and put it in a tiny pot in the sun. This boy took off. Above was taken right after I placed it in moss in September:
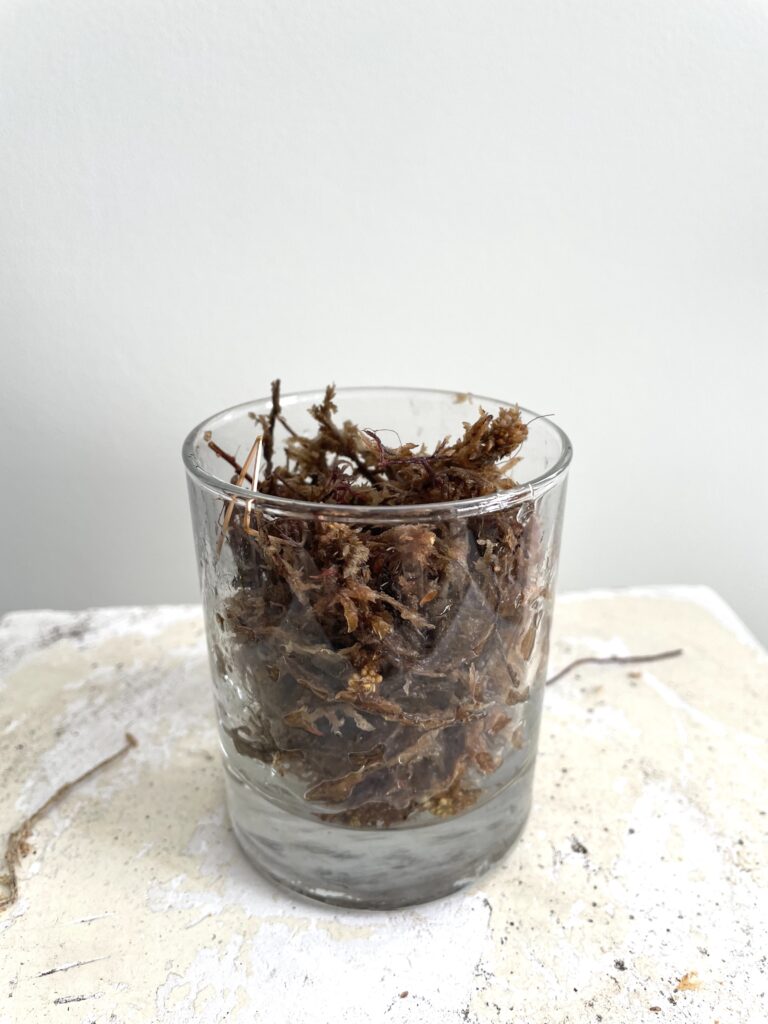
And this is a few days ago! Look at that transformation. While I wasn’t able to visually see the roots like I can in water, I knew it had rooted when I tugged on the cutting a bit. I always kept the moss moist and never let it fully dry out.
Tips for Moss Porpagation:
- You are really just wrapping the roots in moss and putting a bit at the bottom of the planter. Give it a good soak and moss usually needs to be watered once a week.
- I really like moss because I feel like it holds some more nutrients than water, which can be lacking. The trick is to keep the moss moist at all times. It’s really important.
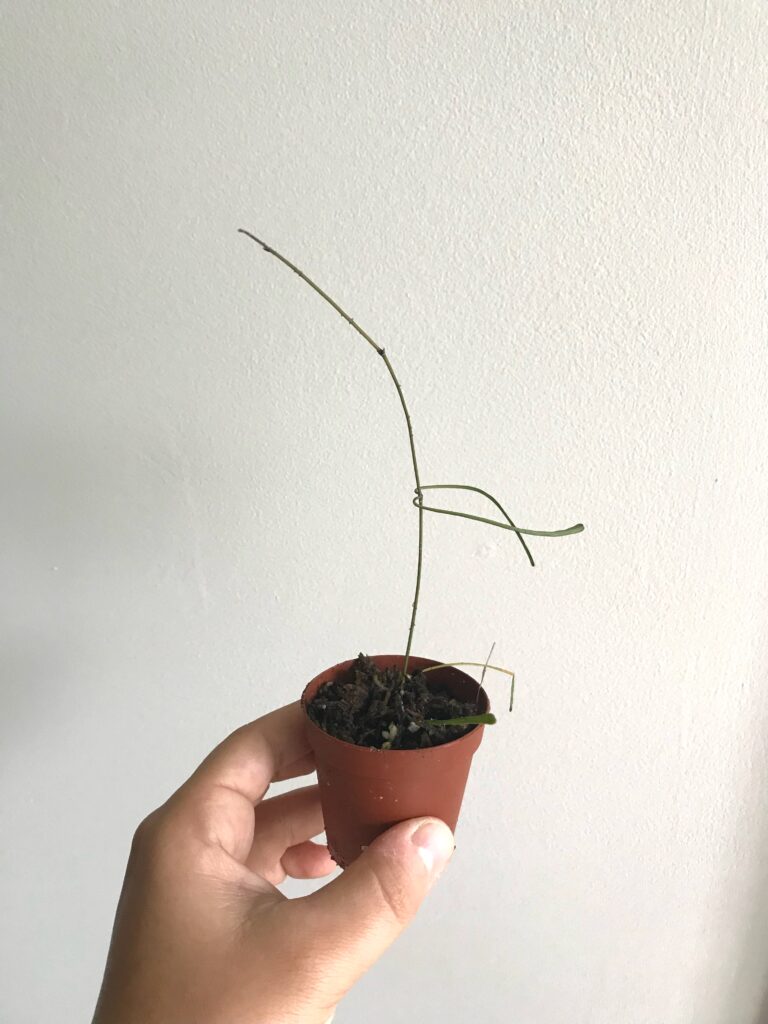
- Moss is especially great for very dry cuttings, too. For example, I got this Hoya mathilde in the mail in November (2021) and it was in some loosely packed dirt and was very sad when it arrived. The roots were dry and brittle. I put some light soil and moss in a jar and soon these roots became plump once again. See below for the smol Hoya now.
- Moss also works well when you are air layering, more about that here, or when a plant needs reviving and was living in soil.
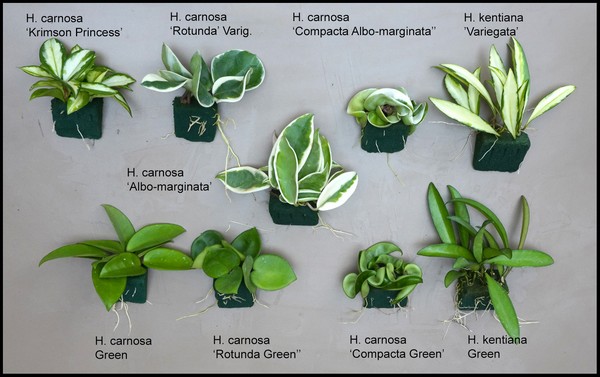
I hope that helps you join the Hoya propagation train, because it’s a fun train. I found this little mini guide (below) for common Hoya – and most of these can be found at a well-stocked plant store.
It’s probably also good to mention I have a post about finding rare plants here, a post on JUST Hoya kerrii, and if you like more info on pet safe plants, like Hoya, jog over here. Happy propagating, fam.

Anastasia thank you for THE most helpful, concise info & esp. the photos w/ mark-ups identifying where & why to snip. My Hoya is from a clipping done in late 1950 from a relative in Montana given to my mother. This plant has been propagated & shared by a sister. It is a treasure to know how to keep it growing!
Again TYVM. Mary Ann from Indiana
Oh my Lord you are hilarious! I’ve just recently become in love slash obsessed with Hoya ! Everything about your prose is so winning…I’m a plant FREAK.There, I said it. Is Deshidia a cousin? I have 2 if them. Shall I propagate the same? Can a leaf alone root? I’ve been a Horticulturist since 1982 I work at a nursery…I hope you see this I look forward to communicating with you✌️♥️
Hi Marcia! And thank you. And yes it is a cousin and is propagated the same way – still cut at a node and keep 2-3 leaves at the top. Good luck!
If I only have one leaf at the top, will it still work???
Yes, it does take time though so patience is key!
Love directions you can understand and pictures showing what to do and after it’s done.