Have a Rubber tree out of hand? Don’t be afraid to propagate! You now have the help of Leaf and Paw. Keep on readin’.
Sometimes doing something once is all you need to have the confidence to do it again. That’s not the case for plant propagation. After two (!) successful Monstera propagations from Monty, my Monstera deliciosa, I had a much better understanding of how and why we propagate the way we do. But that doesn’t quite curb the fear of chopping off plant heads and limbs.
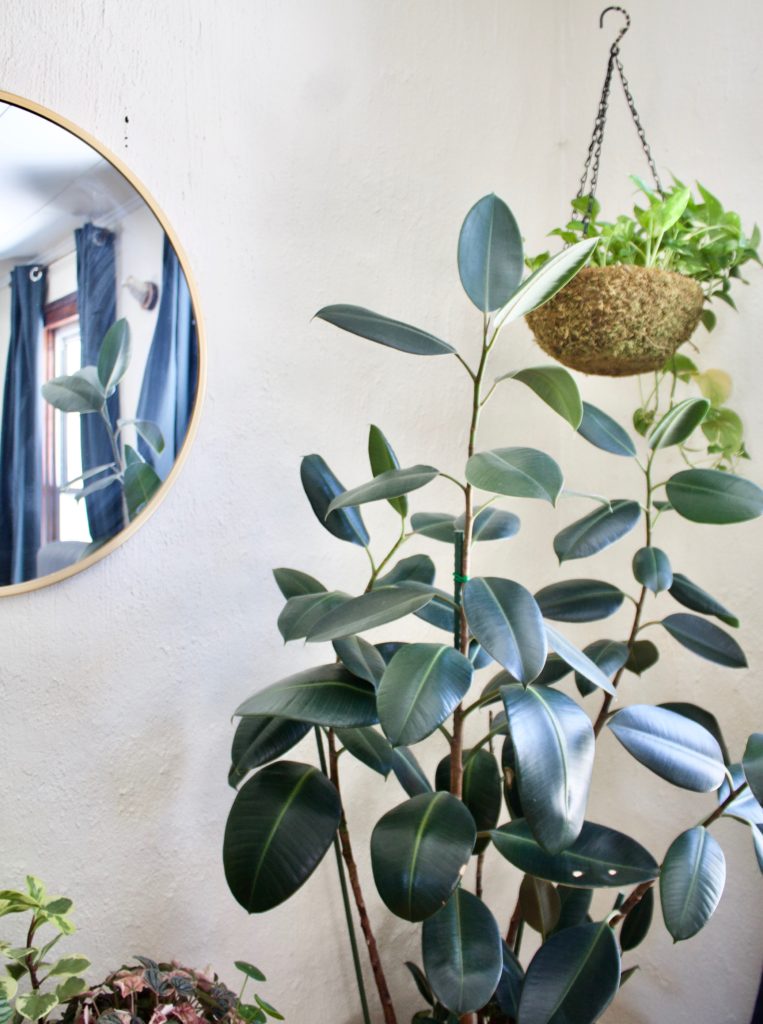
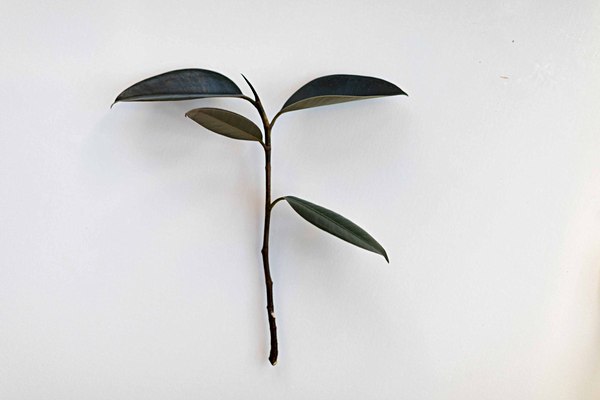
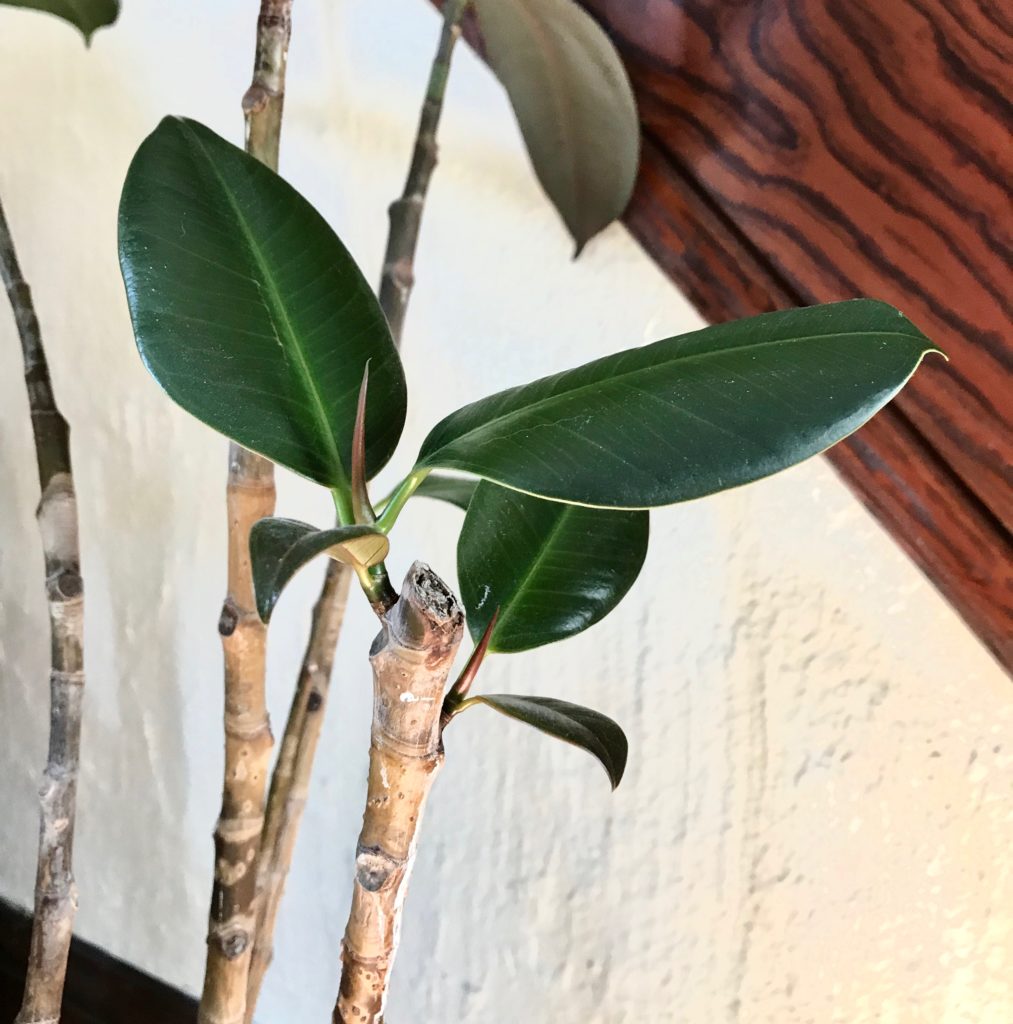
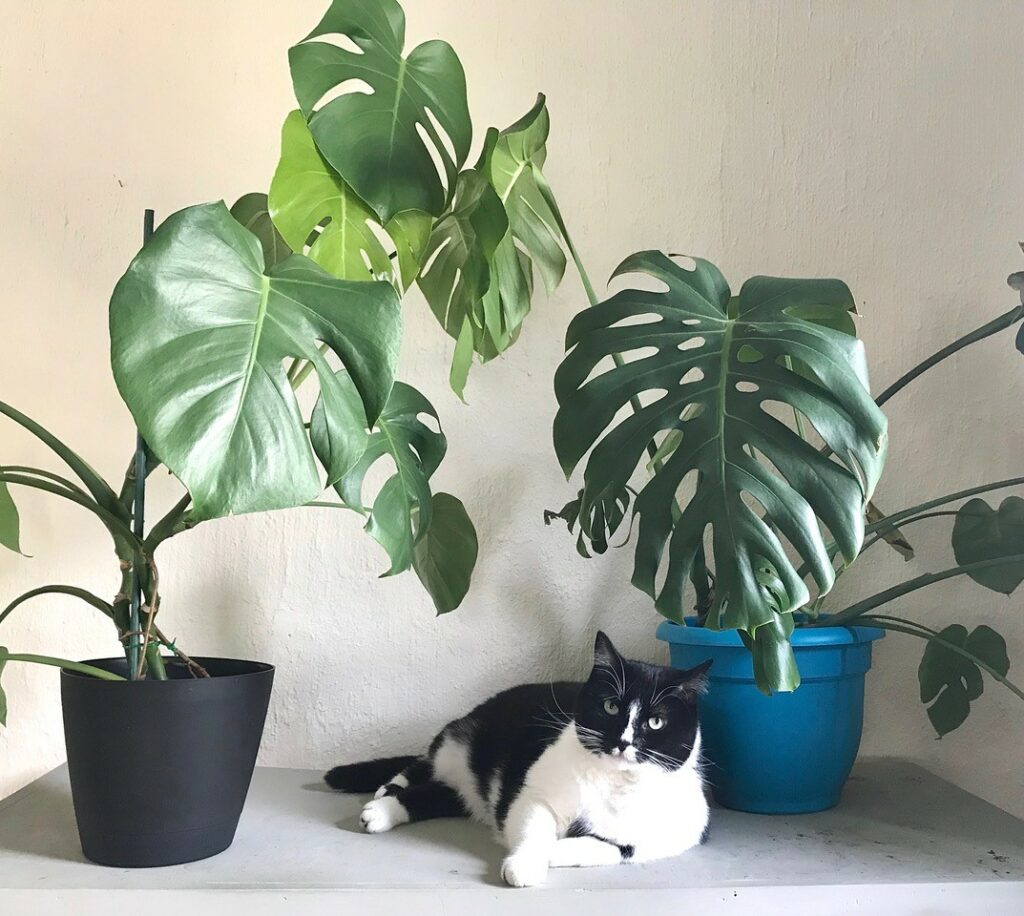
Falling into Monty’s boat, Rudy, pictured above, my oldest houseplant of the family, was also becoming quite big. Actually, his size didn’t bother me, it was the bout of spider mites that infested him that did. For those who have never dealt with spider mites, they are purely creation of the devil and have no purpose but to spread anger and hatred on earth. Anyway.

After I cured Rudy of spider mites, he was left with some funny growth, weird leaves and botched stems. While I think everyone’s unique appearance make them special, Rudy had too many quirks and I wanted him to be pretty again.
When to Propagate
While I know I’m not the only one who prunes their plants for shallow reasons like these, it was time for a trim. I also want to add that Rubber trees do grow quickly, and pruning to maintain a decent shape is necessary for some. Plus, Ficus elastica have a tendency to get leggy if they are not exposed to decent sunlight. Either way, it was time for a haircut.
Like any houseplant, the best time to propagate a rubber tree (or any plants) is in the early spring to late summer, when the weather is warm. This ensures a much better recovery for plants. I performed this in early September, so I was able to still have some sun for Rudy to soak up in NY.
Before we dive in, I want to talk about propagating healthy plants. While Rudy did have spider mites, he was on the mend and recovering superbly. I would not recommend propagating distressed or pest-ridden plants. Many times these pests continue on to affect the cutting which will then die shortly after propagating. I can’t stress enough that the best way to propagate a Rubber tree, or any indoor plant in general, is with a healthy, established mother (or father) plant.
How to Propagate
Prep Your Station
Propagating and pruning is messy, especially for Rubber trees or Ficus elastica. If you have one you know what I mean. They ooze a milky substance when cut and leak everywhere. This sap is annoying to remove and is sticky and unpleasant, so be prepared.
You’ll need:
–An established Rubber tree (no babies)
-A clean surface
-Paper towels
–Rooting hormone (I always use Bonide because it actually works)
-A pair of sharp pruners
-A small pot with filled with a 50/50 mix of gardening soil and perlite
-A gallon zip top bag
Before propagation, I like to gather all of my materials first. For you cooks out there, think mise en place. Now, let’s jump in.
- Pick the stem.
Pick a healthy stem with healthy leaves. I picked a leggy stem on Rudy that didn’t receive much sun and would benefit from being pruned.
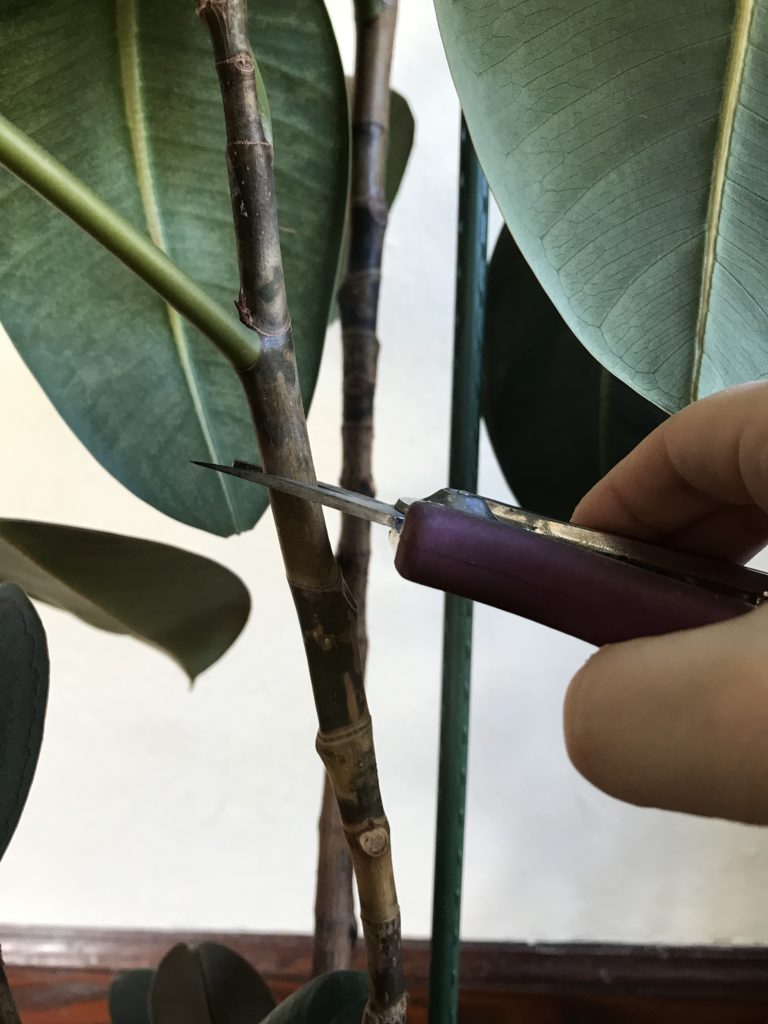
- Make the cut.
Cut about halfway up this stem. Preferably, have a leaf right below the cut on the main plant. Immediately dab this cut stem on the mother plant with rooting hormone. Be careful of this oozing sap, it’s sticky and annoying. You’re now done with the mother plant. Time to focus on the cutting.

- Trim the cutting.
Remove the bottom set of leaves from the cutting. I snip these off with my pruning shears. Next, if your cutting is too long (6″ is best) you’ll want to cut it in half like I did below. You’ll want to discard these leaves and this other half of the cutting – they’re useless. At the end of this step you’ll want 2-3 leaves on top.
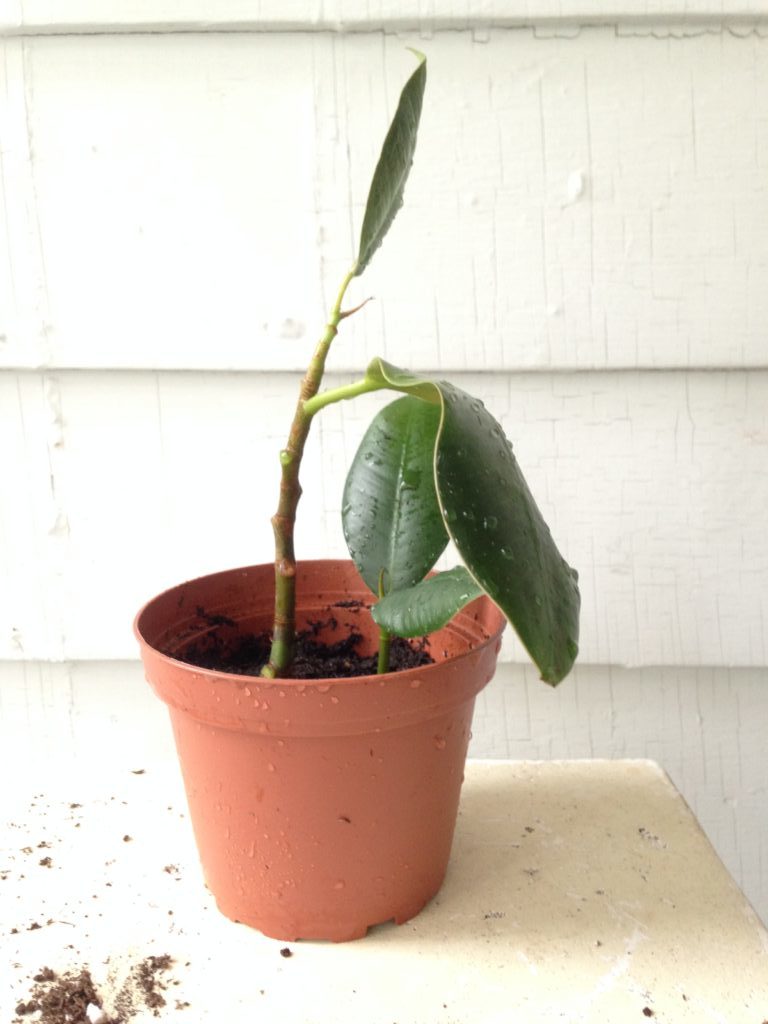
- Pot the cutting.
Dip the cutting in rooting hormone and grab your pot filled with moist soil. Unlike Monsteras, Rubber trees do not need to root in water. These get planted right into fresh soil and are happy clams. He should look like this!
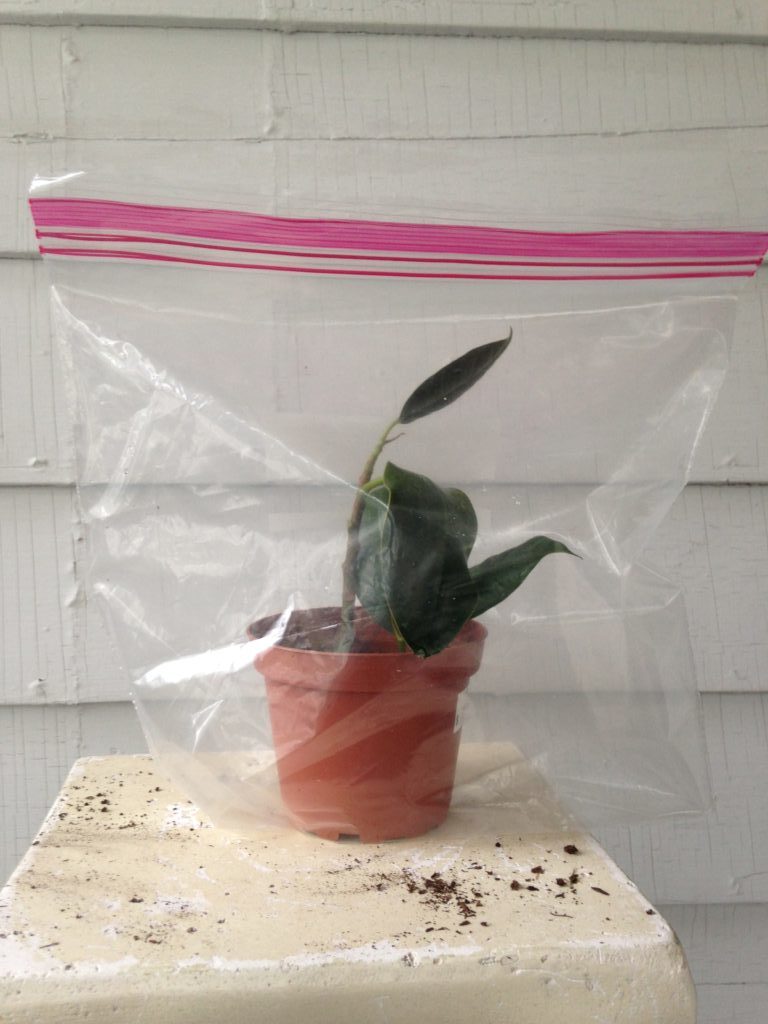
- Provide a (mini) greenhouse.
Remember that plastic bag? This is where you need it. You’re going to make a super casual greenhouse for your new baby. Place him gingerly in the bag and seal it 90% of the way. It’s important the leaves don’t touch the bag too much – you can use toothpick or chopsticks to keep its distance. Give Planty a good soak and place him in a warm spot with partial sun.
- Take care of Planty.
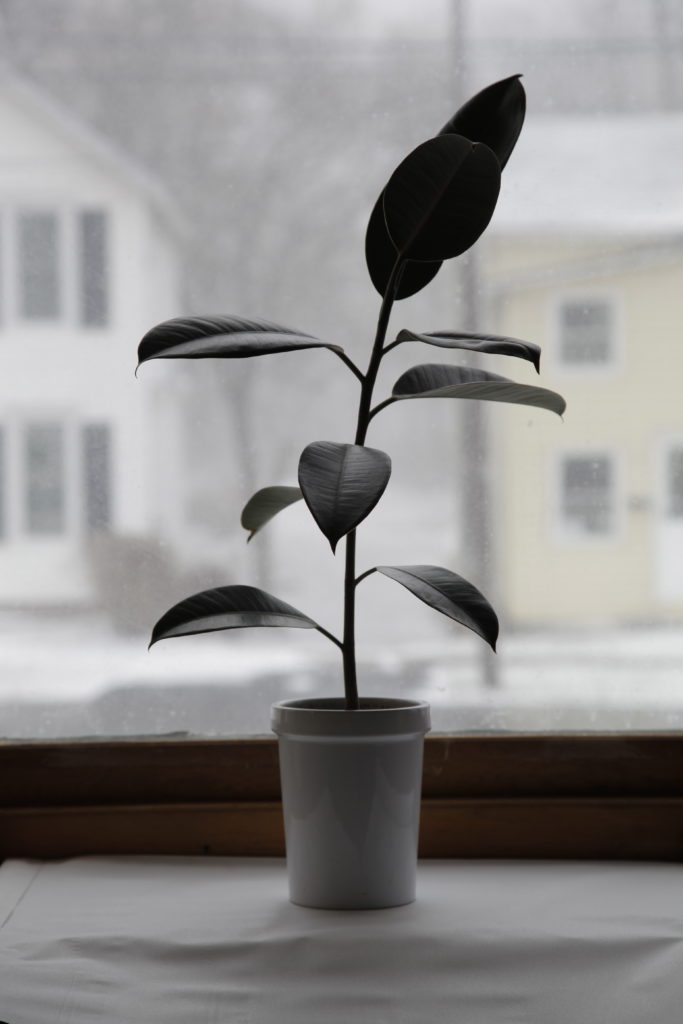
Rubber trees seem to take FOREVER to grow the initial new leaves. Keep the soil moist and his home warm – you need to be patient. You can remove the bag in a month or two. In about a month roots will develop. In about six months you’ll see good root development and will have a new (and free) Ficus elastica with leaves like this!
Now, I not only have a new Rubber Tree, but a happier Rudy. New leaves began sprouting immediately! Remember that the cut will never sprout leaves directly, so don’t be alarmed. Instead, new growth will spawn from the sides of the stem. Pruning stems on Rubber trees every year can help keep their bushy appearance.
Propagating in Water
Experimenting is fun. A less reliable but additional option to propagate a Rubber tree friend is taking that cutting and letting it grow roots in water. It’s similar to the way a Monstera is propagated. Why is this way less reliable? After three tries, I found only one took to rooting, which I wasn’t happy with. They were all cuttings from the same plant, too. You’re welcome, I did the trial and error portion so you don’t have to.
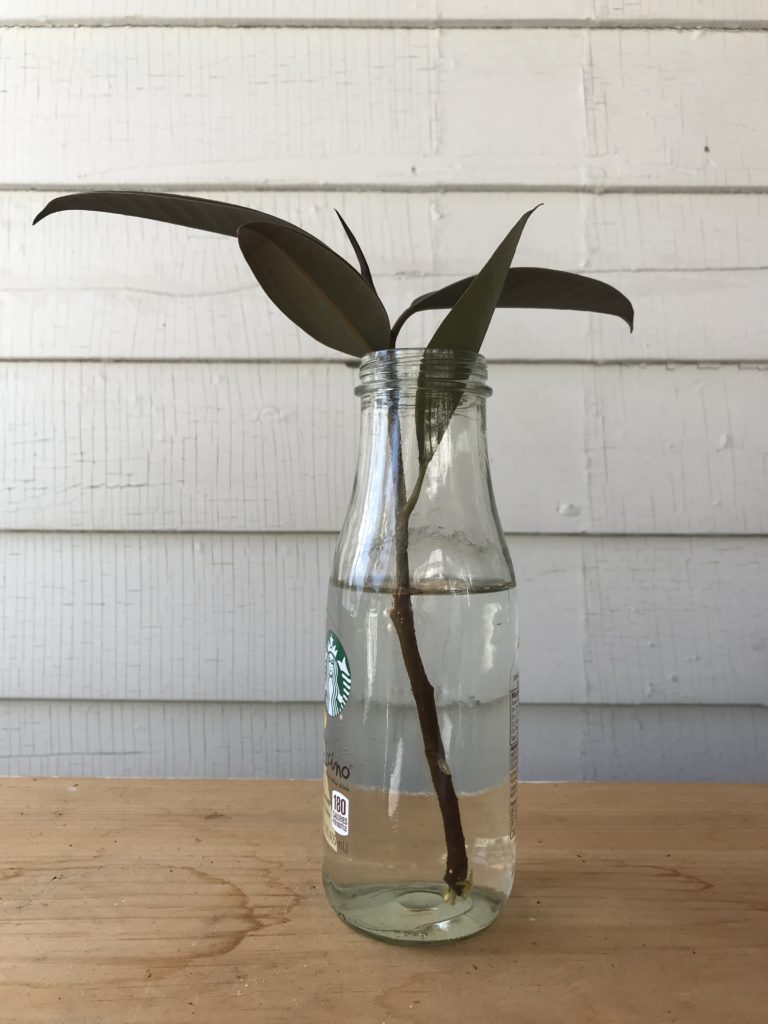
However, I did find this process, when it did start to work, works well. You’ll only need a cutting (removing the lower leaves as above) and a glass bottle filled with water for this method:
- Take the cutting and plop it into a small glass vessel (Starbucks jars are perfect). Be sure to not have the bottom of the cutting touch the bottom of the bottle/jar. This hinders root development which looks sad.
2. Wait. Yup, just wait. Place in a sunny, warm window and in about 2-3 months you should see white barnacle-looking things, some fuzzy stuff. It’s all good – just let it do its thing.
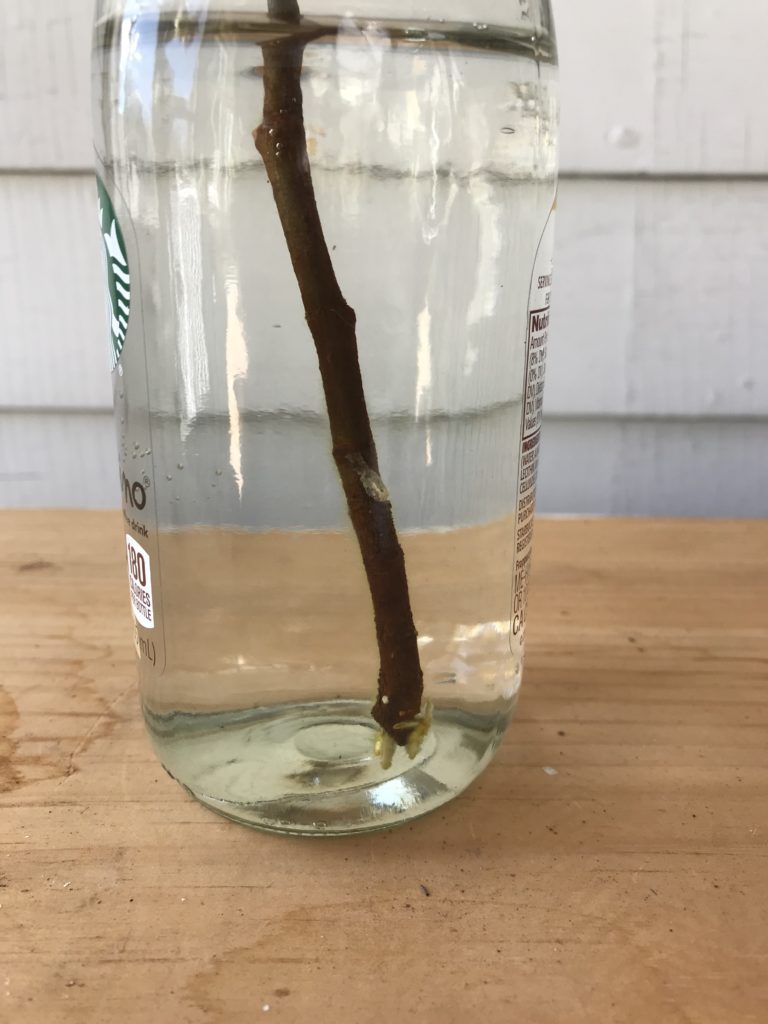
3. Soon you’ll see small white roots show up that look like this! This is a good sign. Let the plant hang out and continue this root growth for another few months.
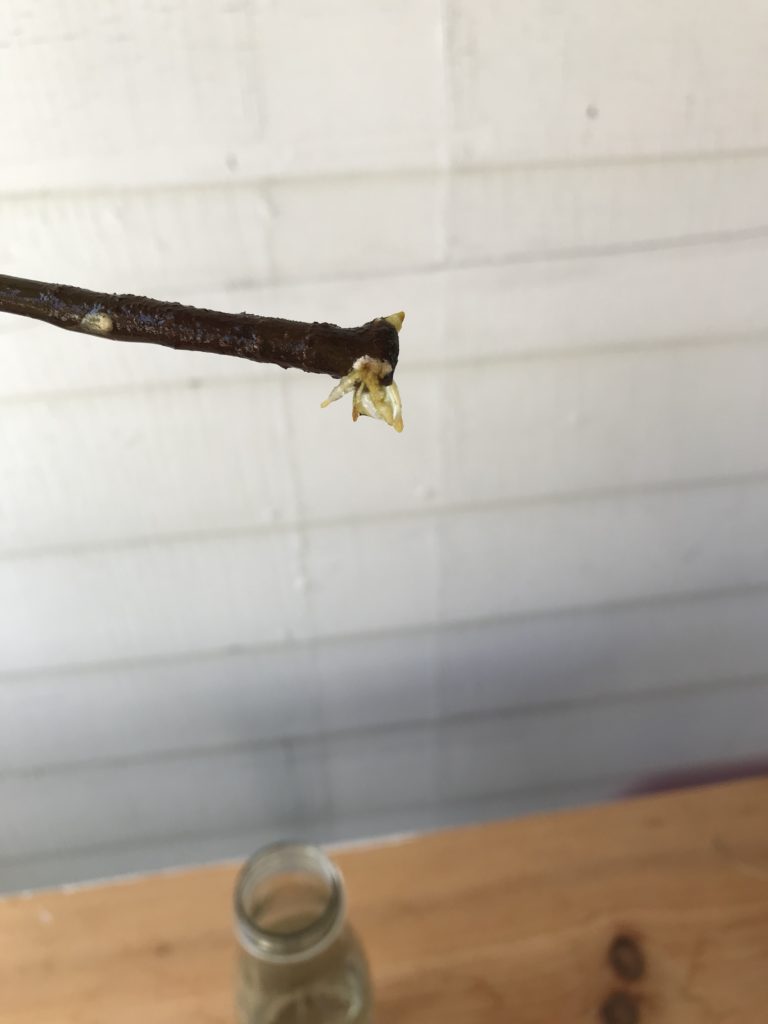
This is a new cutting (as of March 2020), so I’m still waiting for some more goods to show. It’s March now and I’m planning to plant in May or June. Yay!
Did you propagate a Rubber tree using either of these methods or another? Need some tips? Leave a comment below!
*Leaf and Paw takes part in Amazon Affiliates, so we get a small percentage of any of these sales so we can make more content for you!
Hello! For a year I can not stop trying to cut my ficus elastica but without success.
I followed your method also the method in the water but I do not know the reason for my failure. Help!
Hi Alaya, make sure the plant stays in a humid place while is it starting to root – some people let the new cutting dry out which leads to it dying. What are the issues you are having?
My friend gave me a rubber tree cutting 3 years ago, and it’s now about a 5 ft tall single stem. I would like to try and give it more of a shape rather than one tall branch with leaves. Any suggestions now that he’s gotten so tall and lanky?
It could be light – they tend to get lanky when they don’t have bright light, which rubber trees like. I would definitely cut it a foot and let it branch out. You can certainly propagate the cutting and just pot it up with the mother plant too!
I tried to propagate a rubber tree before a couple of times but I failed each time. However, maybe it could be because I sealed the bag completely. What do you think?
Hi Leanore, they are tricky but yes sealing the bag suffocates them. Always keep the bag partially open, I always seal it 3/4 of the way and leave the rest open.
I propogated mine in water and it was going so well but now I’ve planted it, it looks very wilted and unhappy. I’m scared it is done for!
Hi Andrea, were there enough roots? If not, that can definitely be why it’s wilting. Also be sure to keep the new plant out of drafts. Feel free to send a pic to my facebook or Instagram and I’d be happy to take a look!
I’m moving out of state, and have found a new home for my large rubber tree plant, but I’m planning on taking a cutting with me to start a new plant. Because I’m going to a different state, I am not really allowed to bring any ‘foreign’ soil, so I was hoping to root it in water. Can I do this without rooting hormone? Or do I still need that before putting it in water. Unfortunately, I do not have the luxury of waiting until Spring to propagate.
I would use rooting hormone and keep the exposed root wrapped in moist sphagnum moss, then in a plastic bag to hold moisture. These don’t root in water easily, so keeping them in moss will be a lot safer for the travel and short term storage. I hope that helps!
Was given a large lanky rubber tree. My question is this: can I make 2 cuts on the same stem for 2 new plants? Some have sporadic leaves and look like they could make 2 plants.
Also, the person who gifted it to me said they watered it a bit every other day. I did that for a few sequence and am still dealing with leaves turning yellow…. Once they start, they don’t stop. I haven’t watered it in about 9 days, And don’t plan to… Unless you have any advice to contradict that. It’s got at least 8 stems and stands almost 7 feet. I’d like to to propegate it in the spring, but again I’m wondering if I can make 2 cuts on one stem.
Thank you!
Hi Carrie, You should be able to, depending on how long the stem is, how many leaves it has, etc. It sounds like you should be ok, though. As far as watering – that is much too often in my opinion. Unless you have (or it was) in full sun in a warm environment, a bit every other day is not the best method. For large plants, it’s better to let them dry out quite a bit then water well until it runs out of the bottom. Watering a bit every day never really “waters” them, and this is definitely why you have yellowing leaves.
Thanks for the information. I have maybe the biggest rubber tree plant outside of a jungle and it is in the office lobby. A few years ago it was down to 2 leave and I was told to throw it out. I couldn’t. I put it outside in the shade of a tree for the summer and it flourished. It is now over 6′ tall and has at least a dozen stalks and each has multiple branches. Huge! I have to start thinning it a bit, it is taking over the lobby, and want to make babies. I will try what you said and see how it goes.
I love plant rescue stories! I’m so glad you were able to keep him alive. Good luck, Janice!
I have a rescue as well! A victim of over watering and root rot. I have nursed it back to a healthy point but it is leaning an misshapen so I am going to prune it a bit but I want to root the trimmings. I will probably try both methods.
One day in late fall I was at a doctor’s appointment and they had a huge rubber tree plant in their entrance. On the way out, I was allowed to take a piece home. I’d been wanting one but was waiting for spring. So went home and placed the cuttings in water. I had a pretty good sized piece with about 6-7 leaves so I decided to cut it into twos for better odds. Well two of the three sets didn’t make it. I read this article and soon after placed the remaining cutting in a bag. That was early October and now, first of the year, it has 2-3 inches of new roots. I live in Minnesota and am worried that if I transferred it now it won’t make it. Can I leave it in water until early spring?..or should I still transfer it to a pot?
Hi Wendy! It may not, 2-3″ is not enough and I know Minnesota is cold. I would strongly recommend you wait until spring. I once kept a rubber tree cutting in water for 8 whole months and, while it was bursting from the glass with roots, it did amazingly well in the transition to soil. You can definitely transfer to soil/a planter, just be sure to wait for roots double to triple that size.
I’m just curious about this and am unsure if i’ll ever do it , but i just got my new baby rubber tree . so excited less than 2 weeks and he already has 4 new leaves coming !!! i couldn’t be mire proud of him. but anyway he’s about 2 feet tall not sure how old he is but when or i should ask how big and how long does he have to be to propagate him ?
I would definitely wait a while, it helps to have an older rubber tree for propagating, I’ve just had better luck with them. I didn’t propagate Rudy until a few years past. But since yours is sprouting new leaves he must be very happy!
So just cutting and putting in soil will make it grow? I’m nervous. My plant is really old but I don’t want to loose it
Hi Dawn, Yes that will work, just be sure to keep it in a humid environment and out of direct, hot sun.
Hello! I recently bought a large rubber tree and I wanted to cut one of the branches off. Do you think the branch itself would root or I would have to cut the part of the branch off that has bark and only pot the more green looking stem?
Sorry I know that’s mildly confusing. Thanks!!
Hi Fran, I think I know what you mean and a branch cutting (no barky part) should still work out fine. Just be sure to keep the cutting humid and in a warm place. Good luck!
Hi can i propagate the longer branch of the rubber tree
Yes you can! You would still use the same process.
Thank you for this post! My question is can I make a cutting from just a leaf? I have kept my older plant pruned down over the years so I dont really have an extra branch I can whack off.
Would I still need to do the mini greenhouse part if I live in Queensland where the humidity is pretty high anyway? PS I have no idea what I’m talking about, i can barely keep a cactus alive.
I want to try to propagate the rubber tree we have growing outside our door. It’s had a huge growth spurt over the last few months and I’d like to make an indoor plant out of him. He’s very beautiful.
Hi Julia! Lol, you can try without the greenhouse – but humidity indoors is usually much lower than outside, and that’s where I keep new cuttings. It’s really just to keep humidity around the cutting (which needs it). If it’s warm and humid where you are you can sure try!
Thank you for your question, didn’t see the answer, i have been looking for someone
that have posted about” leafs only”, have 7to 10 leaves with roots all over the place
but, 4 in soil, leaves are bright green and i don’t see any growth
I propagated a cutting from my parents Burgandy around August/September of last year. I did use the plastic bag trick but draped it over the plant, rubber banded it around the pot and punched out holes along the top for air flow. (I also used a local honey instead of rooting hormone). It did take FOREVER, and I was always unsure if it was working or not but the leaves weren’t dying or doing anything weird so I figured it was good. A month or so later I took off the bag, and it FINALLY grew a new leaf! This was the first plant I’ve successfully propagated and I’m so proud of it. It’s become my favorite plant, and has grown four new leaves since propagating! I’ve just purchased a Tineke cutting and am excited to propagate that one to add to the collection 🙂
Aw I love success stories! Congrats, Michelle!
After covering the cutting with plastic bag , should we water the plant in few intervals by removing the bag and cover back with bag after watering .
Yes, correct, you can remove the bag when you water it.
All my leaves are shed but white dots are appearing on the cuttings ,it looks like roots . What should I do now
This is a good sign – those white dots are roots so you just need to be patient and wait for those roots to come through.
Hi
Thank you for this guide! I recently rescued a variegated rubber plant from the side of the road. The reason its previous owners abandoned it are apparent, it’s leaves are beautiful and healthy at the top, but it has a very tall and bare trunk. So my question is, if I were to cut it a few inches bellow the last leaves where the stalk is still green, would it root in soil, like a smaller cutting? Thank you
Yes it would! You can try air layering (which I talk about in my monstera post) which might be better. Good luck and feel free to send questions if you have any!
Does the bag have to be clear? I’m guessing yes but I don’t necessarily want to buy a big pack clear zip lock bags if I only need one or two for cuttings so wanted to ask to weigh my options.
The sun needs to be able to shine through, so I wouldn’t recommend a opaque bag, but a translucent one should work.
I have a tineke that lost leaves. can I cut up that stem and propagate it?
You can try, it may work, but cuttings are most successful with preexisting leaves. You may want to wait though – sometimes plants will pop out new leaves even if they’ve lost them – keep an eye out for buds on the stem.
So why do u do if the white stuff keeps going and won’t stop, and now the water I put it into is all milky?
Hi Nikki, eventually the leaking stops. If the water is cloudy (which won’t harm the cutting) just give it a day and change the water. You may need to change it more often if it’s still cloudy but it will stop leaking at some point.
Help – I followed your methods and now I have new growth on my propagated cuttings but no roots. What do I do?
Hi, I would give it time. Rubber trees can take a while before you see anything. Some rubber trees can take longer than others, and it also depends on the conditions they’re in. Roots may not form if the cutting is in a darker or cold space. Also be sure the original plant was healthy.
Hey there, I was advised to place my rubber tree in a fairly shady spot. Is this right? Or would it be happier if it received direct morning light? Thanks
Hi Penny, I have my rubber tree, Rudy, in bright indirect light (meaning no harsh sun, gets about 6 hours of sun a day) and he’s very happy. I find rubber trees can “survive” in shade, but most likely your home is darker than a green house, so it still needs to be pretty bright for them to thrive. I’ve had Rudy since 2015 and found he really only grows in bright light.
Hi! Do you know why a variegated rubber tree’s new leaves would come out smaller than usual? My plant (got it for free from nursery) was in terrible condition with a fungal issue (spots, lead drop) so that now all the leaves on lower 2/3 have dropped. Have you ever tried notching on a variegated stem? Is that even possible? It looks so bare. Also, do you always remove leaves with fungal spots?
I have a tall rubber leaf plant, about 5 foot. It’s trunk is bare, but has a bunch of healthy looking leaves on top. Can I cut it down and plant the top, and get a new plant growing out from bottom trunk?
You can! You can try air layering, water propagation, or just sticking that top part in moist soil. The bottom half should grow leaves once you cut it down, but it may take some time.
Hey there.
I tried the soil propagation but I took the bag off after 2 weeks and the leaves started to fall off and the plant withered after a month. Ironically, I had also put a cutting in water and in just 6 weeks, I alread have long, strong roots!?
Should I pot it in soil now or should I give it more time for more roots? Also when I finally pot it, how often should I water it? As I think that was part of why the ones I potted in soil didn’t survive.
Hi! If the roots seem solid and beefy you should be fine to pot it up. And yes, be sure to keep the cutting moist while it acclimates to soil. Overwatering is always the killer of plants, so to get an idea of watering, I always suggest getting a moisture meter until you get used to watering. You will probably be watering once or twice a week is if it in in bright sunlight.
Hi! I propagated my Ficus Elastica from a leaf that accidentally came off during the repotting of my tree. I just put it in water and after around 6-8 weeks it grew some roots and I planted the leaf in the soil, I really hope it will give me a new tree:)
Hi! You will only get a tree with a leaf when there is some stem attached to the cutting. Just a leaf cutting will not give you a plant, unfortunately, it will just continue to grow leaves – I talk about this more in this post.
pls share updated pics
Month of June pics added – I’m just about to plant!
Hello! I found this information extremely helpful so thank you for sharing! Someone gifted me a rubber plant, however it only grows on the right side. It’s about 5 feet tall and has four main branches all on the right and none on the left. I’m hoping to propagate it (although I am nervous to do so), but I don’t think there’s any hope of it growing on the left side? Should I propagate the entire plant? Also, I live in Japan currently and it is very humid right now so I think propagating should be successful, but I haven’t been able to find a rooting hormone, will it have trouble growing if I plant it in soil without it? Wish I could add a picture to show you. Thanks again!!!
Hi Darrien! You can also try my water propagation method since you can’t find rooting hormone. And hmm, since it just grows on the right side, propagating will definitely help the plant sprout some new horizontal growth. I would just propagate one branch and see how it goes. With it being humid you should have much luck!
Hi! Greetings from the Philippines!
I planted a rubber tree cutting in soil about 20 days ago. I water it once a week. The leaves have started to droop just a bit but are still green. The sheath covering the new leaf already fell and the leaf is starting to unfurl. It’s in a covered spot in our balcony and gets a bit of morning sun. Is there anything else I should do? How do I know if my plant is doing okay? Should I move it so it gets more sun?
I appreciate your sharing your ideas and experiences in propagating a rubber tree! Thank you!
Hi Rosary! Droopy leaves may be telling you it needs more sun. Also, if its a newly transferred cutting, it needs to be kept lightly moist at all times and not dry out. The new growth sounds healthy, but I would just be sure it’s in a location getting decent indirect light (like 6+ hours/day) and check the soil’s moisture content.
You can dip it in *real* honey if you can’t find rooting hormone
You can use cinnamon or honey instead of rooting compound. Wait will Amazon deliver to Japan?
hi, i have a huge rubber tree (10 meters) or(400 inches), can i cut ( 40”) ( branch and propagate it or the cutting have to be 6 inches as you mentioned , what is the maximun height of barnch that i can propagate in water or soil? and why do i have to cut most of the leaves?
Hi Mai, Smaller cuttings with less leaves allow the plant to put energy into creating roots. If you leave too many leaves, the plant continues to provide nutrients to them to keep them healthy. I wouldn’t go any taller than 12 inches and I wouldn’t leave any more than 3-4 leaves.
Loved the article and it was super helpful! I took snippets of my huge rubber plant and gave them to my best friends to propagate and sent them the link to this article ?
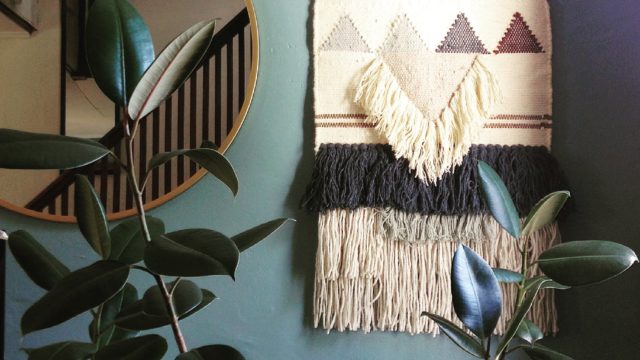
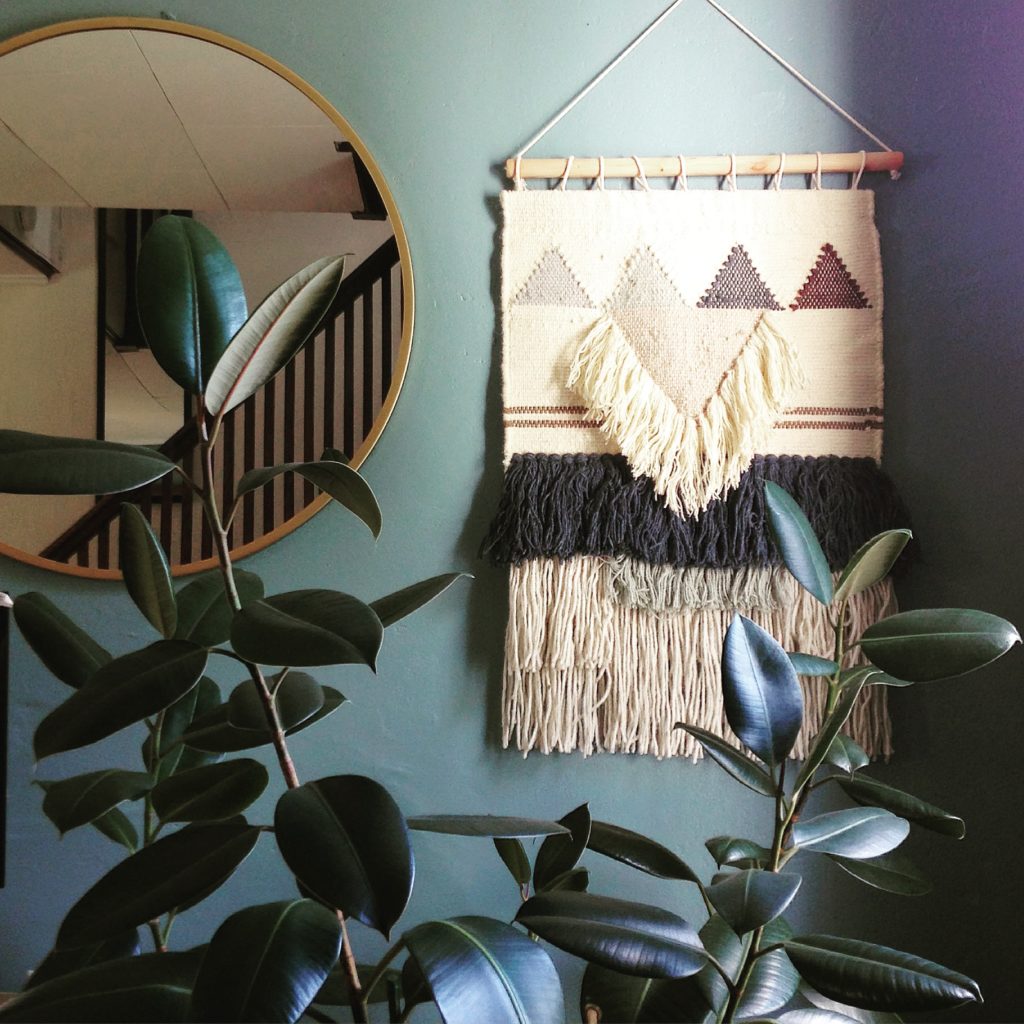
Random question: Where did you get that super cute hanging macrame from? A couple of my friends are very curious.
Hi Joey! That’s so exciting! Glad it worked out. And I think the wall hanging is either from Etsy or Anthropologie a few years ago – I have a lot of wall hangings like this and don’t quite remember – but I found this on Amazon which is kind of similar.
I’m in south Florida so I’m not trying to propagate indoors. I took cutting today from a 20 year rubber tree my granny planted. What in your opinion would be most successful?
Hi Katelin! It depends on the size of the cutting – but the water method should work just fine as long as the weather is warm and sunny. You can always try air layering as an alternative method if you want to let the roots form on the plant, then just snip off the piece.
Great info! I have a mature, tall rubber tree that I had to cut back because it was touching the ceiling. All went well and did get new leaves. Trunk has aerial roots coming out all over the trunk. Can I cut the ones high up on the stem?
Hi Sherri! Not sure if you want to cut the aerial roots or the stems, but either way you can trim either one, yes.
I’m in England and have just been given a 6 foot tall plant by some friends returning home to Idaho. There is a lovely 15″ spur right at the top and having studied your advice I will try to take this as a cutting. Many thanks.
Good luck Jim!
Hi, This is a Great post and so informative! I have an Elastica Tineke, and being a total novice, I repotted it in general purpose compost without any perlite and then sent it to a watery root rot grave. The leaves began drooping and turning brown, and the stem turned brown and shrivelled up. I have cut the top part of the plant where the stem was still green with the last remaining leaves mostly in tact, and put into water in the hope it will begin to regrow roots. Have you had any experience with rubber plants affected by root rot? I’m not sure the water method will work, although its only been 12 hours and obviously the roots take many months to form. Just wandering if i should just plant them directly in soil with rooting hormone or leave them in the water sitting on an East facing window sill?
Hi Harry! Yes I have and 8/10 they don’t survive. Tinekes need quite a bit of sun, so you can try the water method and put in a bright sunny spot. If the stem has any bit of shrivel though it won’t survive, and tinekes take a very long time to grow anything. Just be patient, but if you see anything soggy or black and mushy on the stem an no roots (which will be white), throw it out.
Hi! Im a newbie in propagation… How often did you water while in the process of propagation? I take it the bag is removed every now and then to water.
Hi Jam, it depends on the light it gets but you want to keep the cutting slightly moist, so I would check once or twice a week. And yup, you’ll have to remove the bag to water it, which is fine, it doesn’t bother the plant.
Well I’ve done it exactly as your information with one slight exception. I couldn’t find a big enough plastic bag to make a little greenhouse but I do have one of those so I set it up on the table in the lounge and now I wait to see what happens. I’ll put it into the bay window as and when it’s not too sunny.
Hi! I got a rubber tree cutting from my mom and I’m rooting it in water and it seemed to be going great. Now with a few roots about 5cm long, I’ve noticed that the roots are really flimsy at the point where they connect to the stem, almost as if only a thin string is connecting them. They seem fine otherwise but one of the roots even fell off 🙁 . Is this normal? I’m rooting in a mug and not a glass so I wonder if the lack of light for the roots could have something to do with it? Thank you ?
Hi Ella! Sounds like they might be getting crushed or you need to change the water. If the water is murky it can lead to rot, so it should be changed at least once every couple weeks. Also it helps if the roots are suspended in water – I would move it out of the mug and into some type of taller glass jar so the roots don’t touch the bottom.
Hi, I have tried both methods of propagating (soil and water) but the stem of the cutting rots and eventually dies. Any ideas where I’m going wrong?
Hi Rod, it could be a lot of things unfortunately, the health of the mother plant, water quality, sun etc. If cuttings from the same plant keep failing, the main plant may not be healthy – stems should be firm and not soggy. Also, these need a lot of light. Anything short of bright sun can make them mold. Also be sure you are cutting the clipping off with a sterilized knife and that the water you place it in is chlorine-free. I hope that helps!
Hi, i have bought a 3ft rubber tree cutting and have planted the whole of it in soil just today. Is it fine? Or should i cut it into half or into more pieces?
Hi Em, if it has decent roots you should be good. If there are no roots, you may want to cut it in half and make sure juicy roots develop before you plant. Roots will develop faster with less leaves on the plant.
Hi, i have a tineke rubber plant that is in a bad condition, it’s very droopy and i’m scared that i couldn’t save it. Can i use that stem & droopy leaves for propagation?
Hi MJ, It will most likely rot if propagated, since the mother plant is unhealthy. If the stem is mushy, it is probably too far gone to save. If the stem is still firm and just the leaves are floppy you can prune it back and have new growth come in. Tinekes get droopy when they are waterlogged (too frequent watering) or kept in a very hot environment.
Me and my two cats LOVE your site! I’m doing a few different propagation tests – various stem cuttings in either soil or water. My question is about the water prop leaves… root nubs are finally coming in, after about 7 weeks! Took a while to figure out the lighting situation. But along with these tiny new roots, each stem/leaf cutting is also pushing out a tiny baby leaf. Should I remove the new baby leaves? The roots are still about 2-4 mm and I’m afraid the new leaf will take a lot of energy. What do you think?
Hi Lia! Nope, keep those baby leaves, that is a good sign that you’ll be able to repot soon. Usually when leaves start to come in it means it is getting sufficient light now, so keep doing what you’re doing!
After you make your cut, do you wait for the sap to stop running before you dip it in rooting hormone? Or is it important to act fast and get the rooting hormone on ASAP?
I usually dab some of the sap off so the hormone doesn’t cake on. It’s perfectly fine to wait until it stops oozing.
Hi, I am trying to propagate my lemon lime rubber plant in water. After about two weeks it was starting to grow roots and then one night for some reason, it fell from the water. And since then I haven’t seen any progress with the roots and the two leaves have fallen off. Is my cutting a goner?
Hi Emily, it sounds like the roots may have dried out a bit or it was damaged. I would check for any damage, and if its clear stick it back in a water (in a secure place) and keep in in a bright environment. When rubber trees are growing roots they are fragile, so he may just need to acclimate to water again. If the stem starts to shrivel or get mushy, it is beyond repair. Good luck!
Hi! I cut my rubber leaf to propagate yesterday, I put the cuttings in water and then came across your blog, can I pull them out of the water and stick it in soil or is it too late?
Hi Michelle, you definitely can. Either the water or soil method works well, but transitioning it to a different medium within a next few days is fine.
Hi Anastasia, i got a few questions. Can i propagate rubber plant in sphagnum moss instead of soil? i’ll still keep it in a plastic bag to retain humidity. Since i heard that sphagnum moss usually has better chance of success compared to water, do you think it’ll increase the chance of success for rubber plant?
Also, when should you water the cutting that is propagating in soil?
Thanks!
Hi MJ, Yes you can definitely use moss, it’s a great propagating material. I didn’t here because you can’t see the root development, which I love to watch. And as soon as you plant, water the cutting thoroughly. You never want it to completely dry out for the first 6 weeks, but once it’s established you can go back to a normal rubber plant water schedule, which is only watering when the soil is dry.
Hi! My rubber plant is seemingly healthy (no mites/bugs) but at least one large, healthy leaf falls off each week. I’m not sure why this is happening or what I should do to fix it. Help!
Hi Tania, sounds like overwatering or moving to a different location with different lighting. Rubber trees are sensitive to light changes and will drop leaves if they go from lots of light to not enough. They should be in bright indirect light. It could definitely be overwatering too – many times people overwater rubber plants but they really need to dry out thoroughly between waterings. Hope that helps!
Hello. I cut my Rubber plant with roots and stem leaving it with 1 leaf. Will it grow?
Hi Timothy, it should. A new leaf should pop out near where you cut – be sure to place in a warm bright location to ensure if has the best chance to put a new leaf out.
In a whole month isolation for the plant, how often do we have to open the plastic bag to water the plant?
I watered mine maybe once a week, but I checked it (opening the bag, feeling the soil) every few days. Mine was in pretty decent sun, too.
I propogated a rubber plant 7 weeks ago it had 4 big leaves now that it’s rooting should I cut one of the leaves off to promote growth? Also a smaller rubber plant I propagated has 2 leaves one is shiny one is dull seems unusual, what do you think? One last question how do you control gnats with all the plants you have Thanks have a blessed week
HI there – do I need to put them in the plastic bag if they are outside in late August – humid weather? Its Toronto – so they will come back in eventually.
I wouldn’t bother in that case. The key is humidity (and I know how humid Toronto gets lol) so as long as it’s moist outside you’ll be ok without one.
Hi! I hope you see this question! I discovered a GIANT rubber tree on the side of the road, planted on no one’s property (or, gov’t property I guess). I want to cut some off to propagate. My question is, should I snip a nice big healthy piece with the thick(1.5in) stem/trunk? Also, how tall of a cutting can I get? My goal is to have a nice 4 ft. rubber tree. Can I cut that much off and plant it? Sorry, noob here. 🙂
Hi Alexis! Make sure it’s not specific wildlife preservation property too or that can be illegal. If you are positive that it’s ok to take, you can cut a 6″ piece (bigger isn’t better in this case), the size of the truck doesn’t necessary matter but younger growth is easier to propagate. Follow my tutorial and be sure to remove lower leaves and you should have a 4 foot plant in a year or so. You can try cutting a larger piece off but sometimes they just don’t root and end up rotting, whereas smaller pieces are always easier.
Hi Anastasia! How long shall I keep the new cutting in a plastic bag? Shall I just take it outside (South GA humidity)? But then how do you adjust them from being outdoors to indoors? And one more question: can the rooting powder be used for water propagation (I have a couple of fiddle leaf figs in jars right now- thinking about adding some powder to it). Thanks!
Hi Yulia! I wouldn’t recommend adding powder to water, powder is really for soil propagation for woody plants. Just water will be enough. You can just move it outside I just suggest being careful about sun- you don’t want to to shock your plant if it was at first indoors (and I’m assuming less light) to a very bright outdoor setting with harsh sun. Make sure the transition is similar light levels.
I live in Florida my shears weren’t sharp so my rubber plant cutting is jagged is that ok I also don’t have rooting hormone or a big enough plastic bag. I did stick the cutting in dirt(cactus,and perlite soil) I have in near a window in indirect sun in the warmest part of my kitchen. Do you think this will work or should I pull it out of the dirt and start over
Hi Debbie, It’s probably plenty humid in Florida so it may work but rooting hormone definitely helps. You can try the water propagation method too, you may have better luck.
It’s been about 3 weeks and it seems to be doing good. I actually sat the pot on top of a glass canister the pot fit perfectly just hanging inside but the leaves(4) of them are out. I figure every time I water it drained into the canister and probably creates humidity.
It definitely does! Leaving out some leaves are totally fine, as long as humidity is circulating the body of the plant you’re good.
I have one that has not done so well and is about 3 ft tall, and has a hand full of leafs on it near the top its only one stem. Can I take it and make 4 or 5 cuts to propagate it ?
I would just propagate the top Kyle, and let it branch out.
Hi this is great advice can’t wait to give it a try! Christmas gift idea! I think also a site called indoorplantworld ripped off your article? Thanks!
Hi Chloe! Thanks for letting me know! They most certainly did. -_-
I just wanted to let you know I found another website that appears to have lifted your content and just slightly changed the language. It’s called indoorplantsworld.com.
A facebook seller account also did the same, lifted this blog entry including the pictures without credit to the author/blog owner. https://m.facebook.com/flantitah.ph/ https://m.facebook.com/story.php?story_fbid=109638320887141&id=100771045107202&ref=content_filter
Omg, thanks for letting me know! These people are awful. I appreciate you all sharing this with me!
-Anastasia
HI! my rubber tree cutting is doing great just the leaves are a little wilty should i cut them back? ( cutting leaves in half) thanks so much!
Hi! Make sure it doesn’t need water or is in too hot a room. Very hot dry heat and lack of water can make the leaves wilt. If it’s still wilty after a few days you can cut the leaves off, but it would be best to find the root of the problem so other leaves don’t end up the same way.
Hi, I’m from Philippines I follow what you advice on how to propagate the rubber tree stem cutting. I already have 3 stem cutting of Rubber tree burgundy and all of them have a branches, I think per stem have a 6 or more than new branches but all of them are small, maybe 1-3 inches. It has been 2 weeks and 2 Days inside of plastic bag. Should I remove the plastic bag? Or keep it until the branches will grow larger?
The plastic bag really just helps root development, so if it looks like or you can see roots and new leaves forming consistently, you should be able to remove the bag. I’m thinking in the Philippines, you’ll have plenty of humidity in the air so your plant should continue to grow just fine. Just be sure it’s kept in a bright warm location. Good luck!
Hi again! My questions are do I cut only green stems to propagate or are brown ones ok. Also should I use a part that just produced a leaf or does it matter. Is it ok to cut the leaves in half to fit in the bag. Can I use straight honeycomb honey for rooting hormone? Thanks love your web site
Brown are ok too, I just seem to have a much quicker root response with green/young ones. I haven’t tried honeycomb but I know others have and had it work, so I’d say why not? I would try a younger piece first since they tend to root much quicker.
Hello! I have propagated my rubber tree in soil, and kept it in a bag for 4 weeks. All the leaves on my plant are now droopy and sad! Can I bring it back to life? The soil is pretty moist but I thought it should be moist while in the little greenhouse? Help! Thanks!
I’ve bought a rubber tree cuttings online and forgot to ask if how many days will the leaves be fresh when in transit. I already put my order before asking, and the seller said that it would be around 2 to 3 days for the leaves to be fresh. It will take around 6 to 7 days to be delivered in our place and that made me feel quiet devastated. So will it not grow if the leaves wilted but the stem is still healthy if ever? The cuttings are already dipped in rooting hormones. Thank you.
Hi Ellie, your plant *should* be fine, but upon receiving it do check for a limp or soggy stem or very limp or dry leaves. If you see this, let the seller know and they may be able to send a new plant. If the leaves are just a bit limp, be sure to water right away and let the plant adjust for a week. Sometimes it takes time for a shipped plant to perk up.
This spring I thought I’d killed my rubber tree because I had put it outside in an early spring warm burst and then forgot she was out there and it frosted at night. Literally every leaf wilted, turned white, dried up and fell off ?. I had brought it in hoping for resurgence and only saw sadness. Finally I put her back outside fully expecting to steal her pot for some other plant looking for an upgrade. To my surprise after nearly a month outside she started sprouting leaves! Everywhere! She is almost 15 years old so I suppose she had a robust root system, and therefore managed to recover. She is now very happily Indoors again for the winter. my question is, if I want to propagate this spring, do you think she’ll be strong enough, or should I give her more time to rebound and recover from my unforgivable neglect last spring?
That’s amazing! And yes, I would definitely wait. She’s probably still recovering quite a bit and needs time to pump out those new leaves. You may be able to propagate next year, but leave her be until she looks healthy and plump again!
Hi again! love your website. My questions are about 3 rubber plants I propogated the first one is doing great but it does have 4 big leaves should I cut 1 or 2 off to coax new growth? Next one has 2 big leaves, one leaf has no shine at all, I never seen this on my other plants. The last question the leaves are drooping but still alive. My mother plant is having alot of new growth should I cut off unhealthy leaves? Lots of questions and I thank you for all your information
I wish I could post pictures! I got a HUGE burgundy ficus cutting gifted to me from a local BST group. I had no idea how to propagate so I cut it in half. Each half is about 6-7 inches. I put one in soil with rooting hormone and another in water. It’s been a month and a half now. The one in soil grew 2 long roots. No growth of leaves yet. The one in water also grew huge roots. My trick (I read about it in one of my plant groups) was to put a cutting of pothos in the water with the ficus cutting. Worked out beautifully!
Oh how cool and I’m so happy your plants rooted so well!
The edges of my plant are turning brown. Devastated as I love it so much and worried it will never go back to the way it originally was. The bottom leaves had very soon after I got it. It’s been a few months now and suddenly a few others are getting it. What could this be from? Should I propogate the top part of the stem as these leaves are all heathly?
You can propagate the top part yes. Those brown edges are a sign of distress in rubber plants and usually it’s the plant being very thirsty or in a very dry location. Spider mites will also cause leaf issues. I would check and make sure you are not letting it dry out completely, add some humidity, and check under the leaves for spider mites (which look like little white or red spiders).
My friends mother cut off 5-9 foot rubb r tree branches and told me to stick in the dirt and they will grow. Live in Sarasota Fl. I thought great but cut them back to 3-5 foot, good soil, manure, water, mulch shaded by pal and Bismarck so still some sun. Will this actually work? Mother was old pro but my experience is other plants and mostly other states. Thank you !
Hi Candy – wow! Yes you are correct, massive 9′ branches may not take, but smaller should grow easier. The biggest thing is leaving only a few leaves at the top (3-4), if there are too many leaves on the cutting, the plant will use its energy to keep those healthy and not make roots. When this happens the plant just rots away. You’re doing everything else right though! Just check the leaf count. Good luck!
Thank you. That is what I thought. I lost or gave up on all but one. I had removed leaves. It appears to be alive. I may do what other person suggested and cut shorter and hope for growth. It is about 4 1/2 ft tall. Think will use root starter as well. Appreciate all comments. Hope I can have beautiful bush sometime soon.
Oh no!!! I inherited a 9′ rubber tree that had one branch about half way up.
The tree struggles to stay upright and so I thought I’d cut it just above the first branch and root it to make a new tree, but there’s about 2 dozen leaves, all healthy on the stem I cut.
Should I be taking most leaves off or should I cut it into smaller stems with a few leaves and root those?
I’m using the water method and currently have the 4-5′ main stem cutting in a bucket of water.
You can do either, but if it were me I would try the water method and cut the branch into a couple pieces, still leaving a few leaves on each. The main tree will be very very happy for the prune!
Hello, I have a very tall rubber plant which has very healthy leaves at the top half. The bottom half however is completely bare stem. Can I simply chop the bottom half off and replant the top healthy top half? I am terrified to do it as I love this plant and do not want to kill it!
Hi Jennie, I actually did this exactly for this post and am so glad I did. I cut Rudy basically in half because he was all stem. New leaves sprouted on the main plant and I propagated the cuttings and added them in once established. As long as you follow my instructions you should be fine!
Thanks for letting us know you did this successfully. I may try myself.
Hi! I got some clippings from a neighbor – 3 total. 2 are about a foot or 18 inches. 1 is smaller. I planted 1 of the taller ones in a pot for my FIL with a tight bottom but there are drainage rocks in the pot. The other 2 I put in a pot that I can’t find a tight bottom for, but also has drainage rocks in the bottom. Sadly the pair are both floundering in that pot – the smaller is down to 3 leaves and the bigger is droopy and about to lose a leaf. I had both pots in the same location, both in plastic bags with vents for a month. I’m not sure if it’s the pot? After reading above I’m slightly concerned about over watering but I water both pots at the same time. Any other thoughts? It’s been a few months and the pair hasn’t died but I’m unsure what I should do at this point: even less water, more sun, unpot and try water, repot if they’re too close to the rocks?? I’m what-iffing myself silly and am worried I’ll lose the pot that’s staying with me!! Thanks for any thoughts or tips!!
Hi Katie! Honestly you may need to do all of the above. These need to not be in a large pot because when they are there’s more soil to stay wet which suffocates the roots and kills them. I would repot so they are snug, be careful of your watering and get a moisture meter, and these need bright sun all day everyday. Watering is definitely your number one issue and a moisture meter will help you with that, but if you correct all of these issues the plants should bounce back. 🙂
My rubber tree was doing fine all winter here in Berlin, until a couple weeks ago – I think he is suffering from this salt issue that happens with giving water in a “sipping” fashion (I just learned about this) but I am not sure. Some leaves yellowed and fell off, and then the three leaves that remained were drooooopy. Part of the main trunk nearest to the soil, is thinner and wrinkly looking too, but above that the stalk is green and healthy. I repotted him in small, appropriately sized pot, with universal soil with perlite mixed in (its all I have), and used filtered water to water him on the day of repotting. Now 5 days later, he is still drooping…and the soil is still moist.
I am wondering, since the wrinkly part is too damaged and it looks like my plant is going to die, should I cut him above that wrinkly part and try to propagate in water? What would you recommend? Thanks in advance for your help. I hate that he is doing so poorly after surviving the winter. 🙁
Hi Tara, I’ve had this happen to me too and it is too damaged. I would, if I were you, do exactly what you’re thinking. Cut a few centimeters above the wrinkly part and examine the stem, if anything is discolored or unhealthy looking, cut more so the stem is completely healthy then you can propagate that piece. Good luck!
Hi! I am about to take a cutting from a friend and I was just wondering how necessary the rooting hormone is? I have looked and can’t find some anywhere, will it work without it?
It’s not totally necessary, I’ve even propagated without it! It just gives the cutting a boost.
Hello! I’ve got a cutting from a friend’s very large and very healthy tree. The cutting is about foot and a half with 7 large leaves (about 10 in long). The friend kept it in a water bottle until I was able to pick it up. By the time I picked it up, the roots were about the same size as your picture from March 2020.
Unfortunately, I didn’t know any better and planted it right away without pruning any leaves at all. Now, two months later, it looks quite sad with leaves hanging down and previously bright-red tip turned dark brown. I don’t know if it got rooted or not. Question is – should I just wait and see? Or am I better off taking it out, cutting off the bottom inch or two, dipping into rooting hormone, pruning 4 of the bottom leaves and re-potting? Any ideas and suggestions would be much appreciated! Thanks!
Yes – I would 100% do the latter. Prune from the bottom, chop off some leaves and start again. Make sure the stem doesn’t have any black in it (that indicates rot which is not good), and place in a very warm location. Also, if the new leaves are sad, you may already have a rot issue, so just be sure to inspect the plant/cutting fully before you place in water.
Hello! I have a rubber plant in the office I work in that grew to be very very tall but due to the lack of people in the space and the uncontrollable heat in the winter during the pandemic, the plant died or rotted. There is one sprig that have a 3 leaves on it but they are drooping and sad looking but not dried out. Perhaps the roots are rotten? All the other leaves looked the same but have fallen.
If I cut this sprig off, can I propagate the cutting or will it not work since the leaves don’t look too healthy?
Hi Phoebe! You can definitely try – chances are if there’s any rot on the cutting it won’t make it, but I would try and see what you get. If you see any black anywhere once you cut, that’s a sign of rot.
I just followed this method with my moms rubber plant and got three 6”cuttings out of it. I planted them all in different pots, didn’t add any extra moisture to the (not dry but not too moist) soil, and covered with plastic bags. I put chopsticks in to keep the leafs from touching the bag and closed the bags 3/4 of the way. I put the pots in a place with a mix of indirect and direct sunlight. 5 days later the chopsticks were covered in mold 🙁 I changed the bags for a clear tote that would fit all of them, sprayed fungicide, and wiped off the leaves. I left the tote lid cracked and didn’t add any extra water this time either. I put the toe in a place with very indirect sun. I’m scared help!
Hi, not sure if you can help but I had a ficus tree outside that had to be cut down(been here over 20 years)… I’ve heard ficus are pretty hard to kill, do you think if I plant it in a pot and put it in the same area the roots might grow back? Thanks!
Hi Kristin, As long as the cutting isn’t super big (no more than 3 leaves) you should be able to propagate it just like I did here, just on a bigger scale. And yes, you should be able to plant it in the same spot, as long as it’s warm and moist. You can also plant multiple cuttings and divide the larger pieces, hope that helps!
I’m in south Florida where it’s always warm & humid. If I put my rt prop on my front porch outside should I still cover with a pastic bag? Humidity is always over 60%. Right now it’s 87% haha
Hi Stacey – lol! I think you will be fine without the bag, Florida humidity is perfect for propagating.
Hi there, I have a rubber tree that is doing well. Unfortunately, my son accidentally broke two small branches. Not cleanly cut through but enough that they are now dropping. If I cut those branches off cleanly, could they be propagated ?
Hi Andrea – Yes, they can be. Cut them cleanly off the mother plant and you can propagate by following my guide and you’ll get some new babies!
Hi, my dark rubber plant is going gang buyers! 2 branches nearly a metre high.
It’s now developing new shoots ? pups from the very bottom. Can l remove these from the main branches to propagate?
Thanks for the feedback
Amanda
Yes you can Amanda. Those are called suckers and they prevent the plant from growing as quickly, so yes, it’s best to remove them and propagate!